Just a couple of weeks before my Senior year of high school was about to start, our Denver home sold and Kellie and I were in the car a couple of days later to make it to tennis and volleyball tryouts in Utah.
There were lots of surprises in that whole transition-but one of my favorites was the ridiculous (ridiculously fun!) number of dances in Utah high schools. You see, I came from the land of two dances: Homecoming and Prom. So MORP and Preference and Sadies and all of these other interestingly named gatherings were totally new territory. And I loved it.
You should also know that hair just isn’t my thing. I’m not really any good at it.
So for Homecoming at this new school with all these new people, I was really excited to go. And I don’t know where I got the idea or from who I borrowed it, but I decided it would be fun to use one of those triple-barrel curling irons (I don’t even know if that’s what they’re called…). End of the story? I looked a little like Mufasa. It was a little traumatic.
I guess what I’m saying is that we could have called this, “how to not look like Mufasa when you do your hair yourself.” But that’s just not as catchy.
Before I go any further, I should put your minds at ease and tell you that this post is not me, Mufasa-girl, telling you a thing about hair. Yeah, that wouldn’t go very well. But our good friend, Carley, who has been doing hair for years and is now teaching at a local hair school, came to give us some simple tips for homecoming hair.
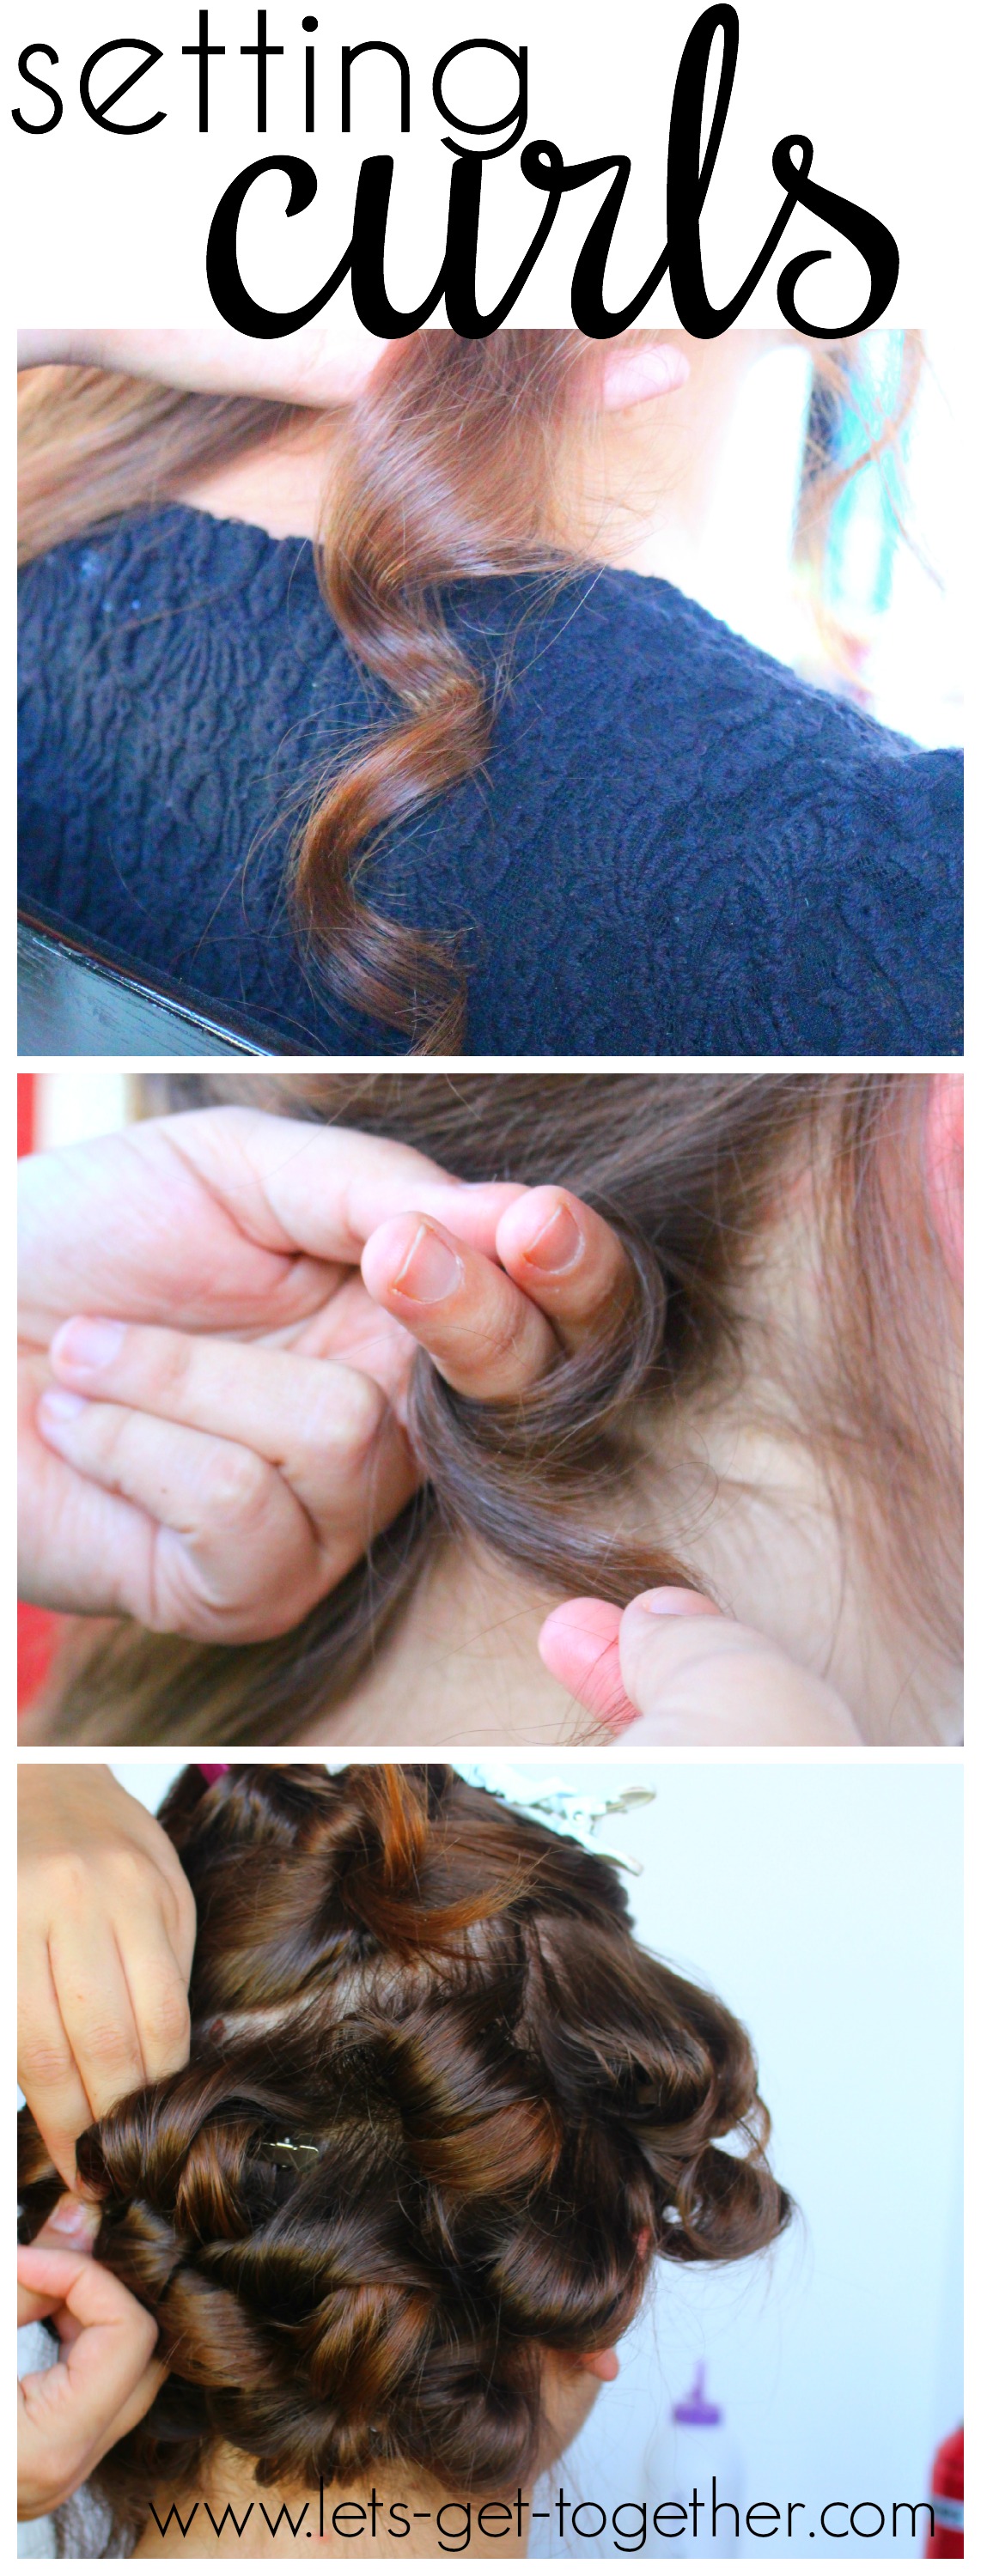
Let’s start with Curling 101.
1. Start with some dirty hair. (Clarification. That doesn’t mean to go run 3 miles and then sit down in front of your mirror.) If you need to wash it right before styling (or even if you’re going on hair that hasn’t been washed in a day), apply a mousse or lightweight styling product to damp, towel-dried hair and blow dry it into the hair. Sometimes hairspray is just not enough if your hair has a hard time holding curl and the mousse will help hold the end style.
2. Section out hair in 1-2 inch U-shaped sections and pin. Pre-spray each section with hairspray as you section it out.
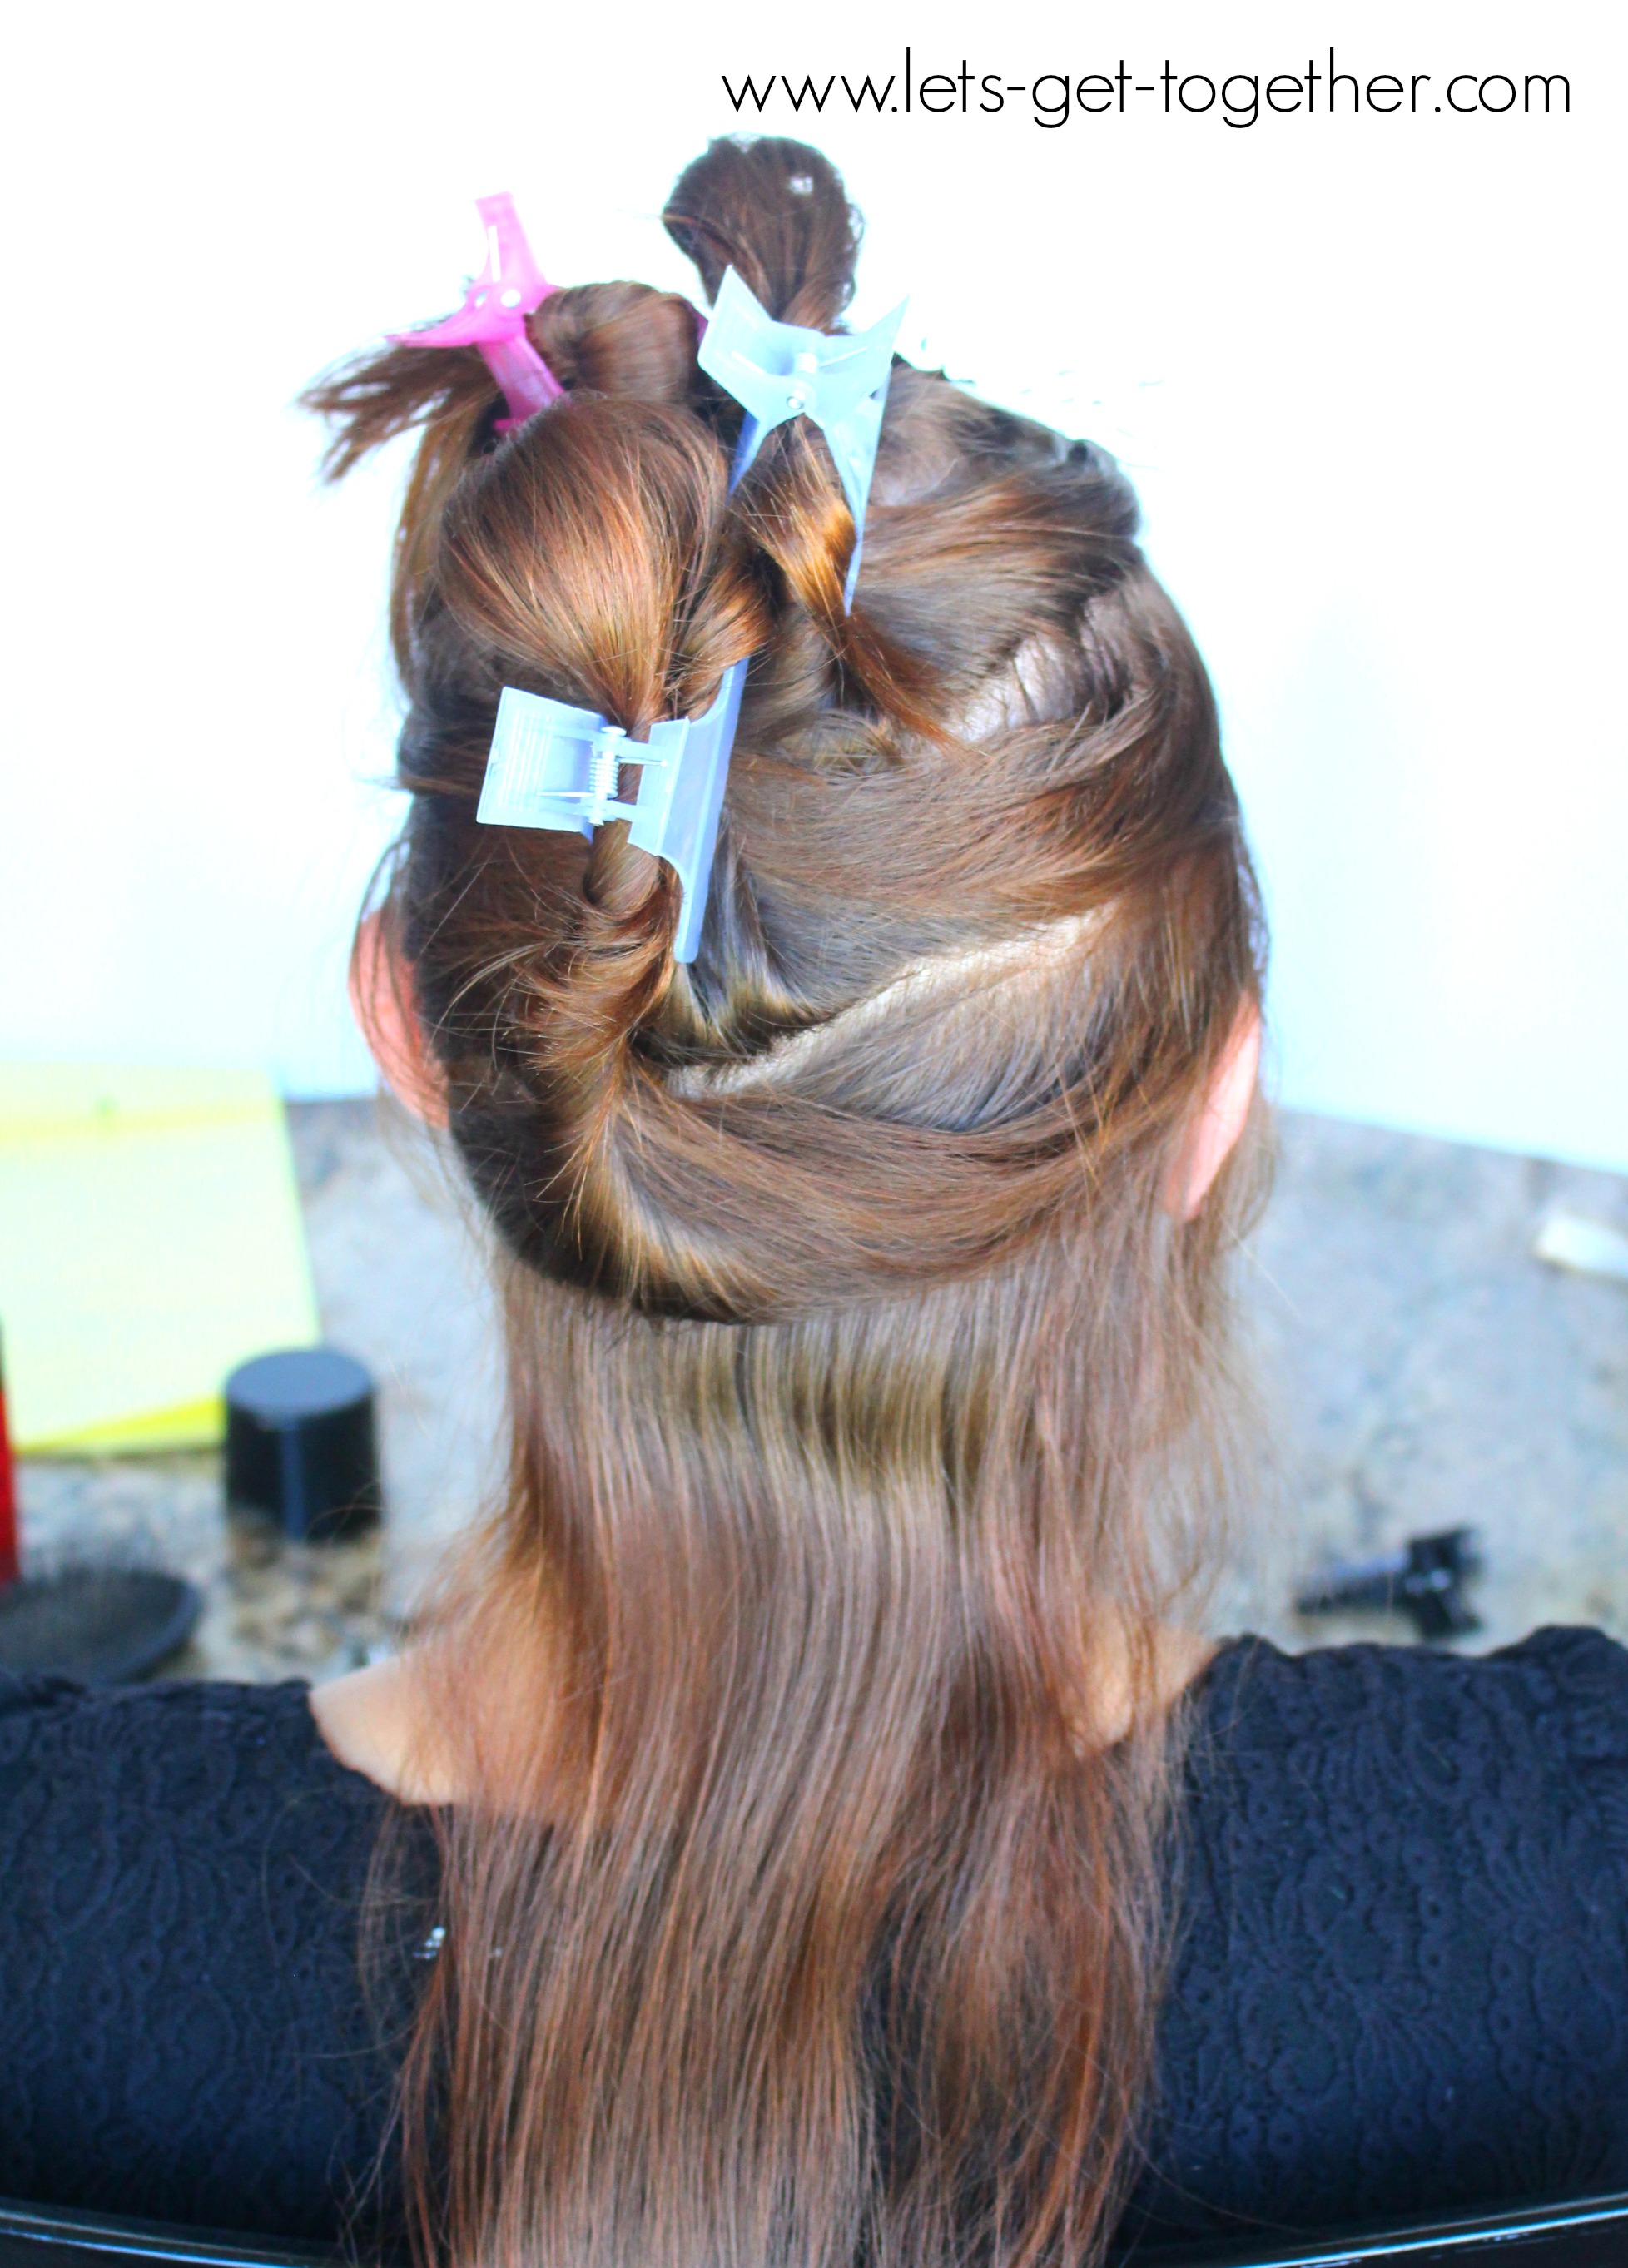
3. Curl from the nape of the neck, moving up. To set your curls, you’ll want to curl a section, roll it around your fingers, and then pin it to your head with gator clips (single prong curl clips) . This fights the weight of the hair (and gravity) that pulls the curl out before it has time to cool.
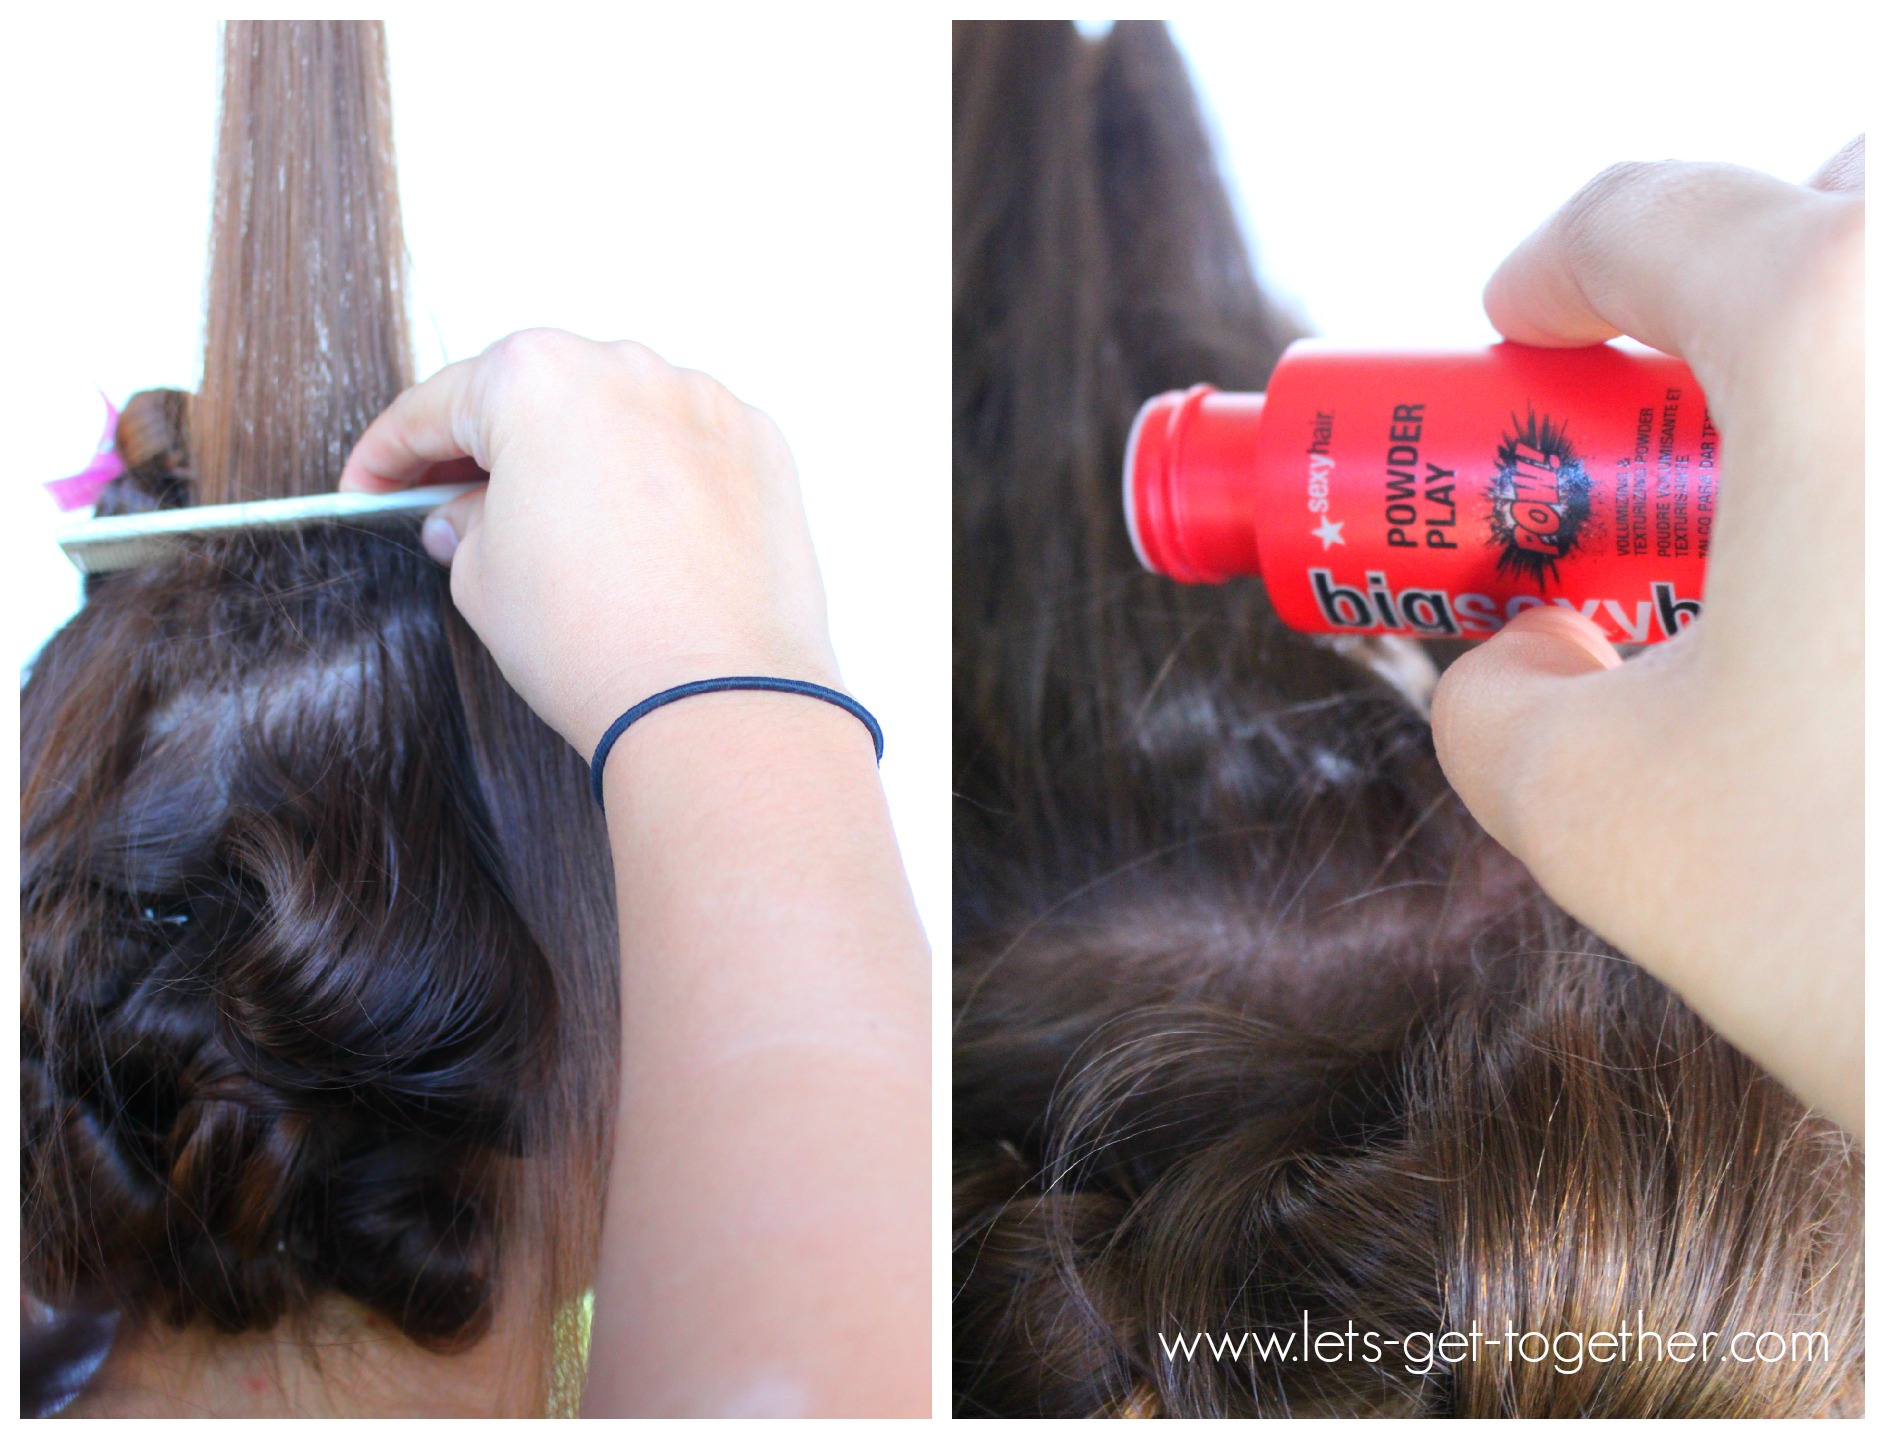
TIP: To add more volume to the style, it may help to backcomb/tease the top sections of the hair. A great styling product to add a little extra hold when backcombing is Powder Play by Big Sexy Hair. Sprinkle a little of it onto each section near the roots and backcomb it into the hair. It will look white at first, but will disappear as you work it into your hair. Then you can curl each section and set the curls. It is easier to flatten hair later, but it will mess up your curls if you go back later to add more volume.
4. Once you’re done curling, don’t touch!! Let your hair sit in the gator clips for at least 5 minutes. The idea is to not take the clips out until the hair has cooled. If you’re one of those people who has hair that just doesn’t seem to curl, you’ll want to let it set as long as possible.
5. Rapunzel, Rapunzel, let down your hair. Or just take out your gator clips and shake it out. Gorgeous. Retouch anything that looks a little funky with the curling iron and you’re done!

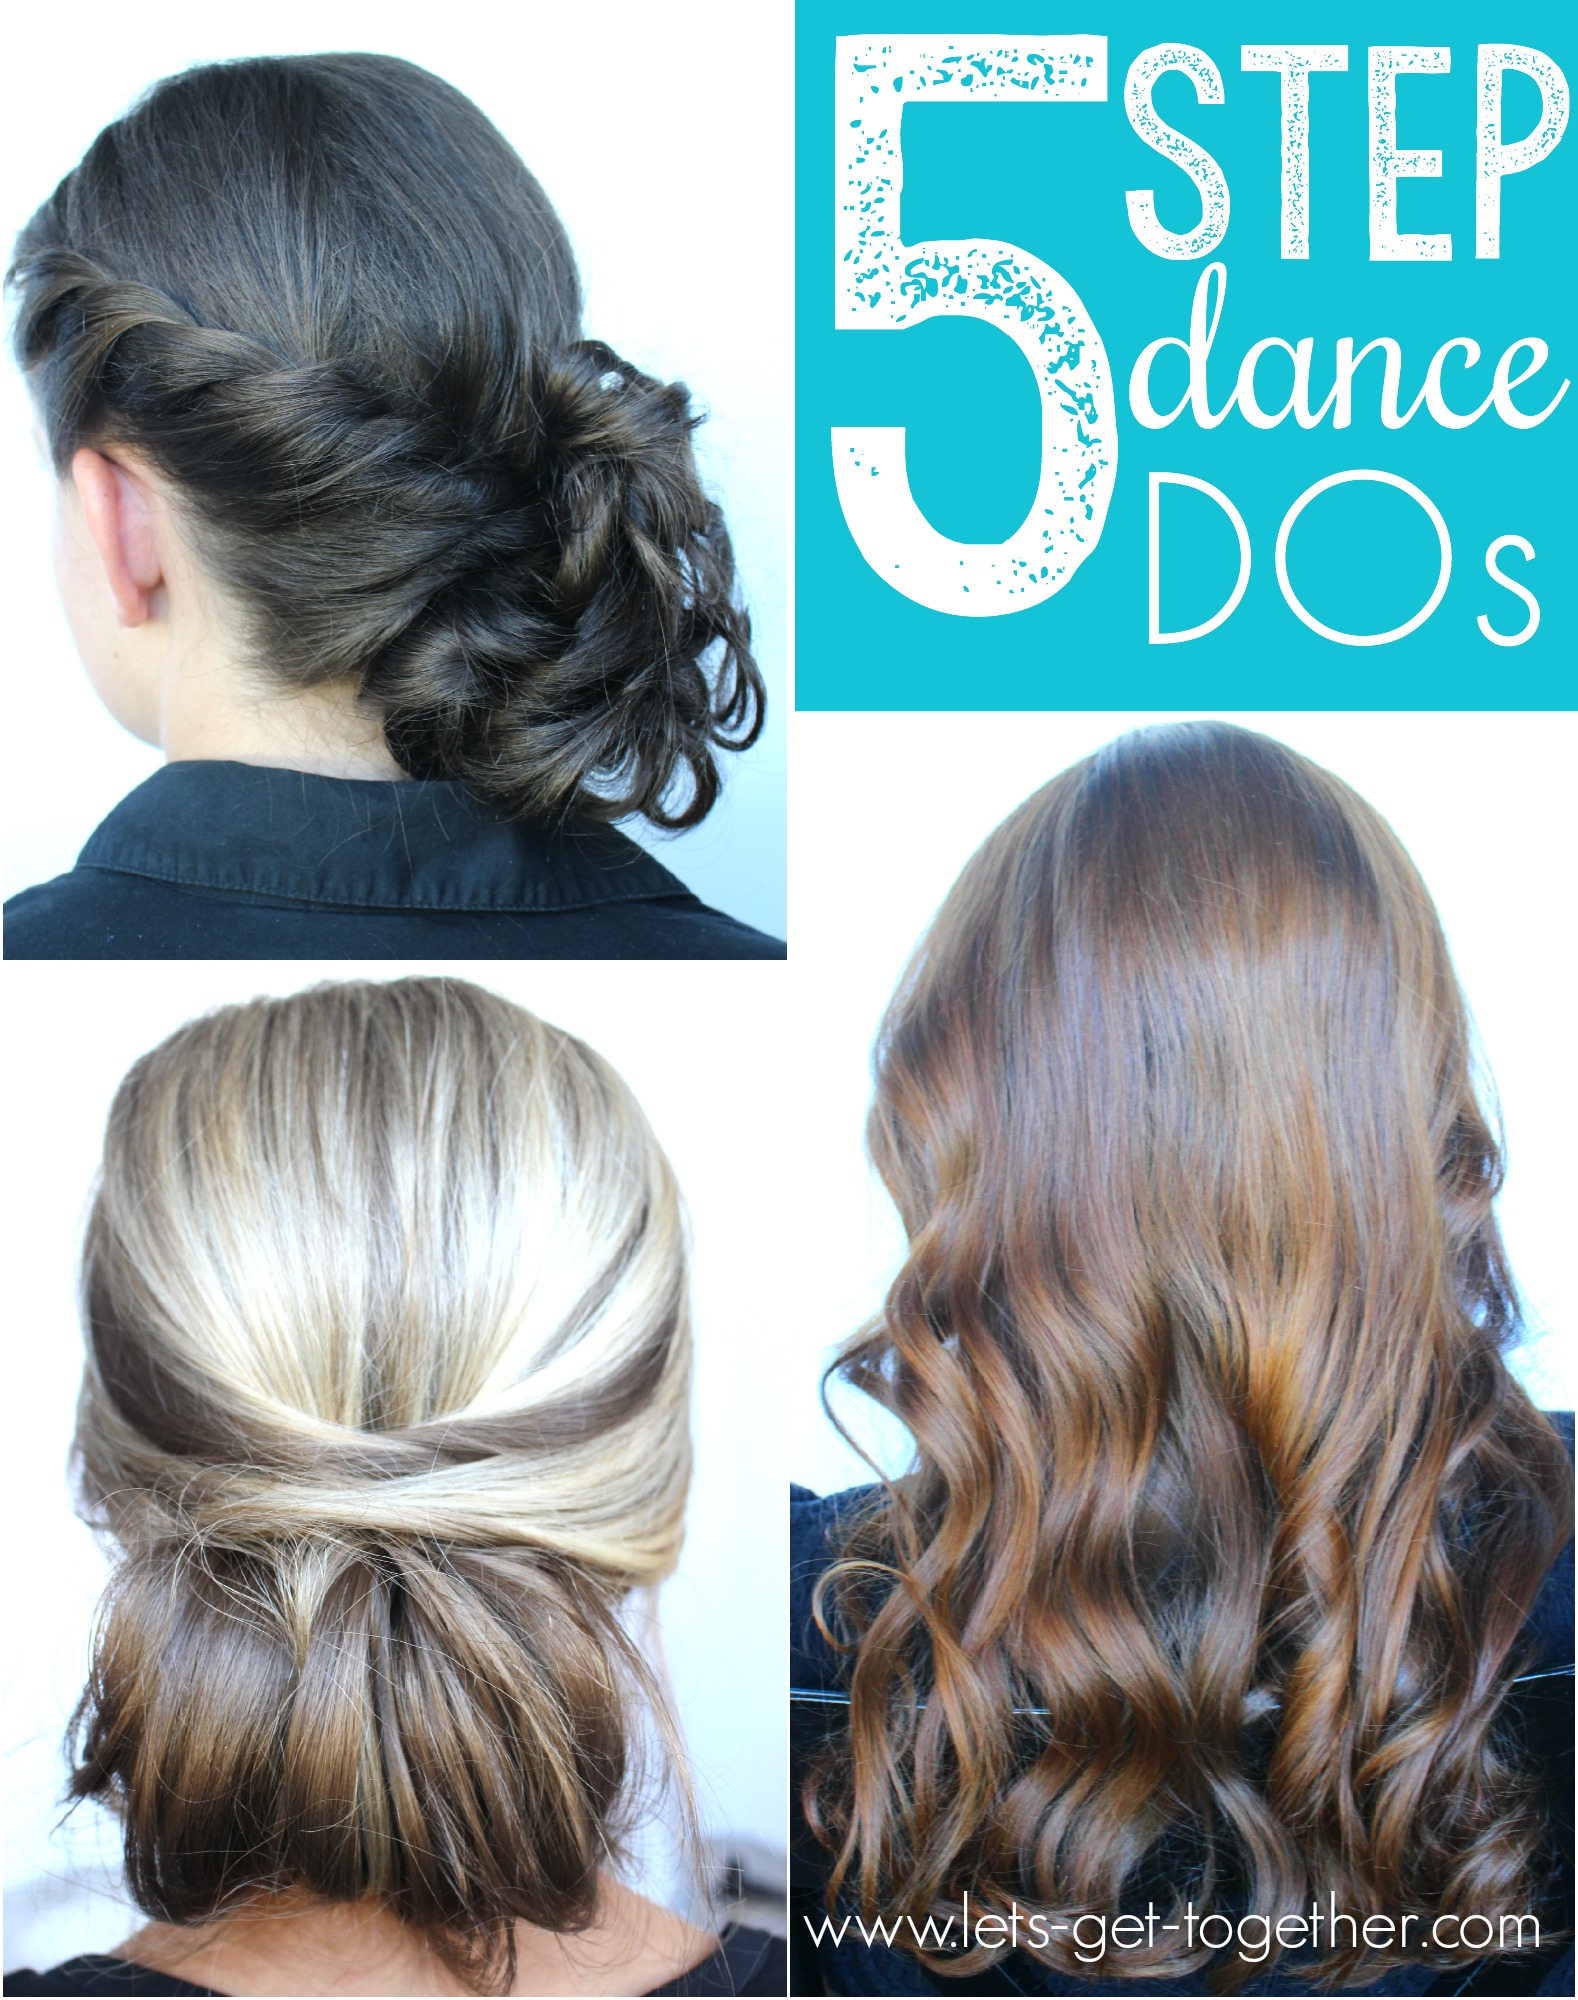
Now we’ll build on what we learned in Curling 101 to style this beauty…
1. Curl, pin, and set your curls.
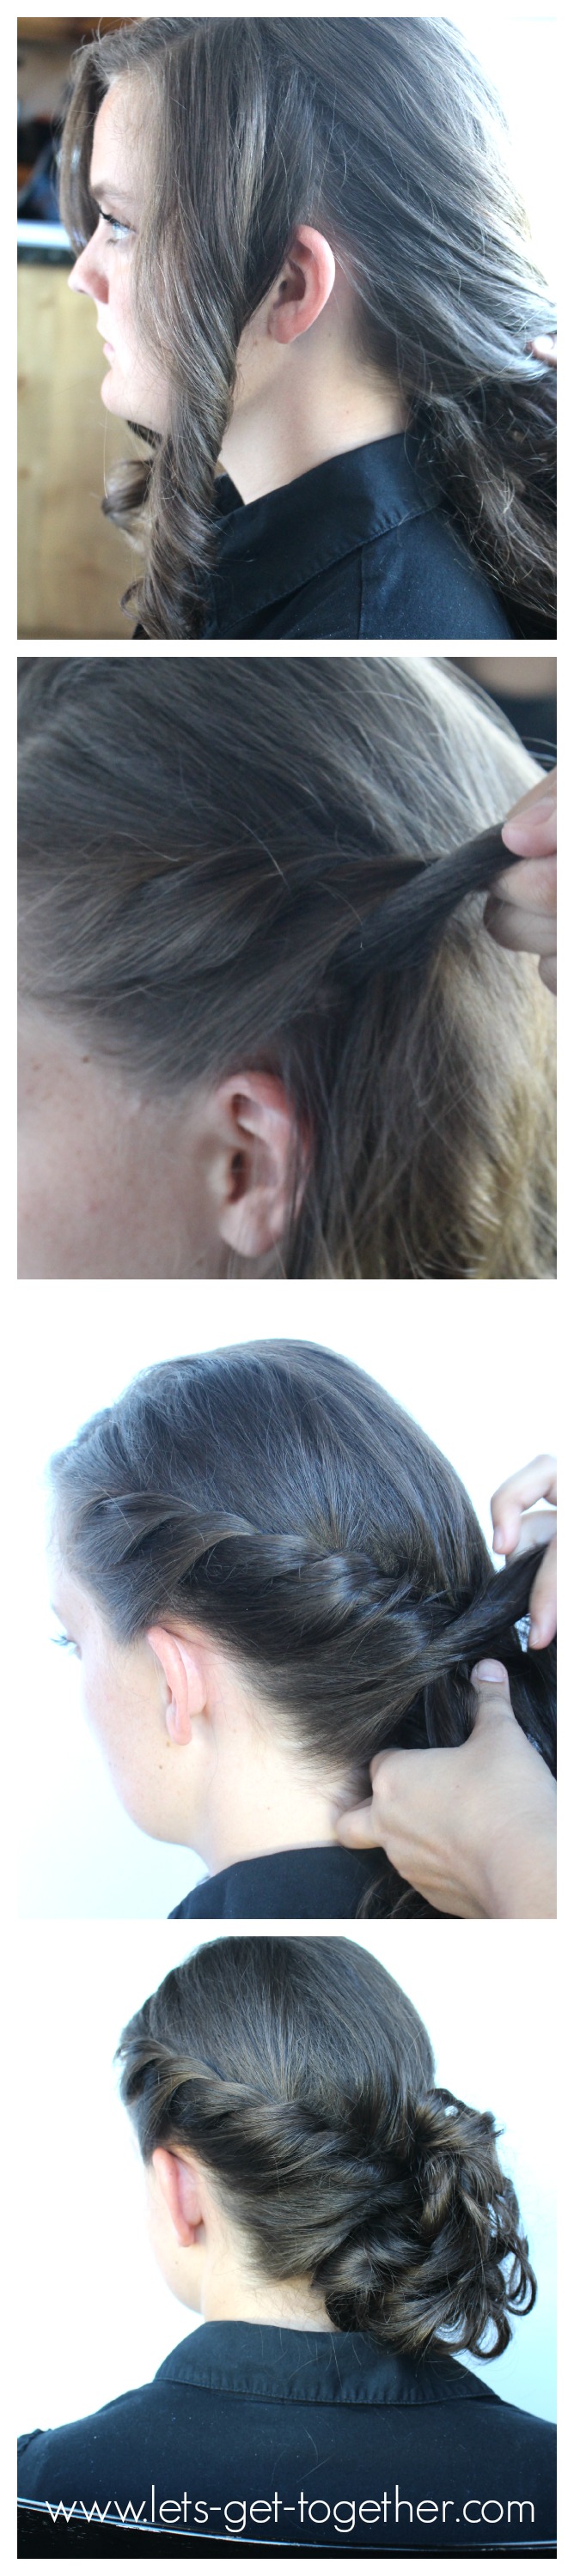
2. Section out the hair in front of your ear on both sides. This is where you’ll start your twist.
3. Starting with the front left piece of hair, twist and then add more hair from below. Repeat until you reach where you want to place your bun. (For this do, we did a low bun on the right, so we did a lot more twisting on the left side.) When you have decided where to place the messy bun, use two bobby pins and secure the end of the twist to the head. Note: bobby pins will be more secure if you overlap them in an “X” pattern.
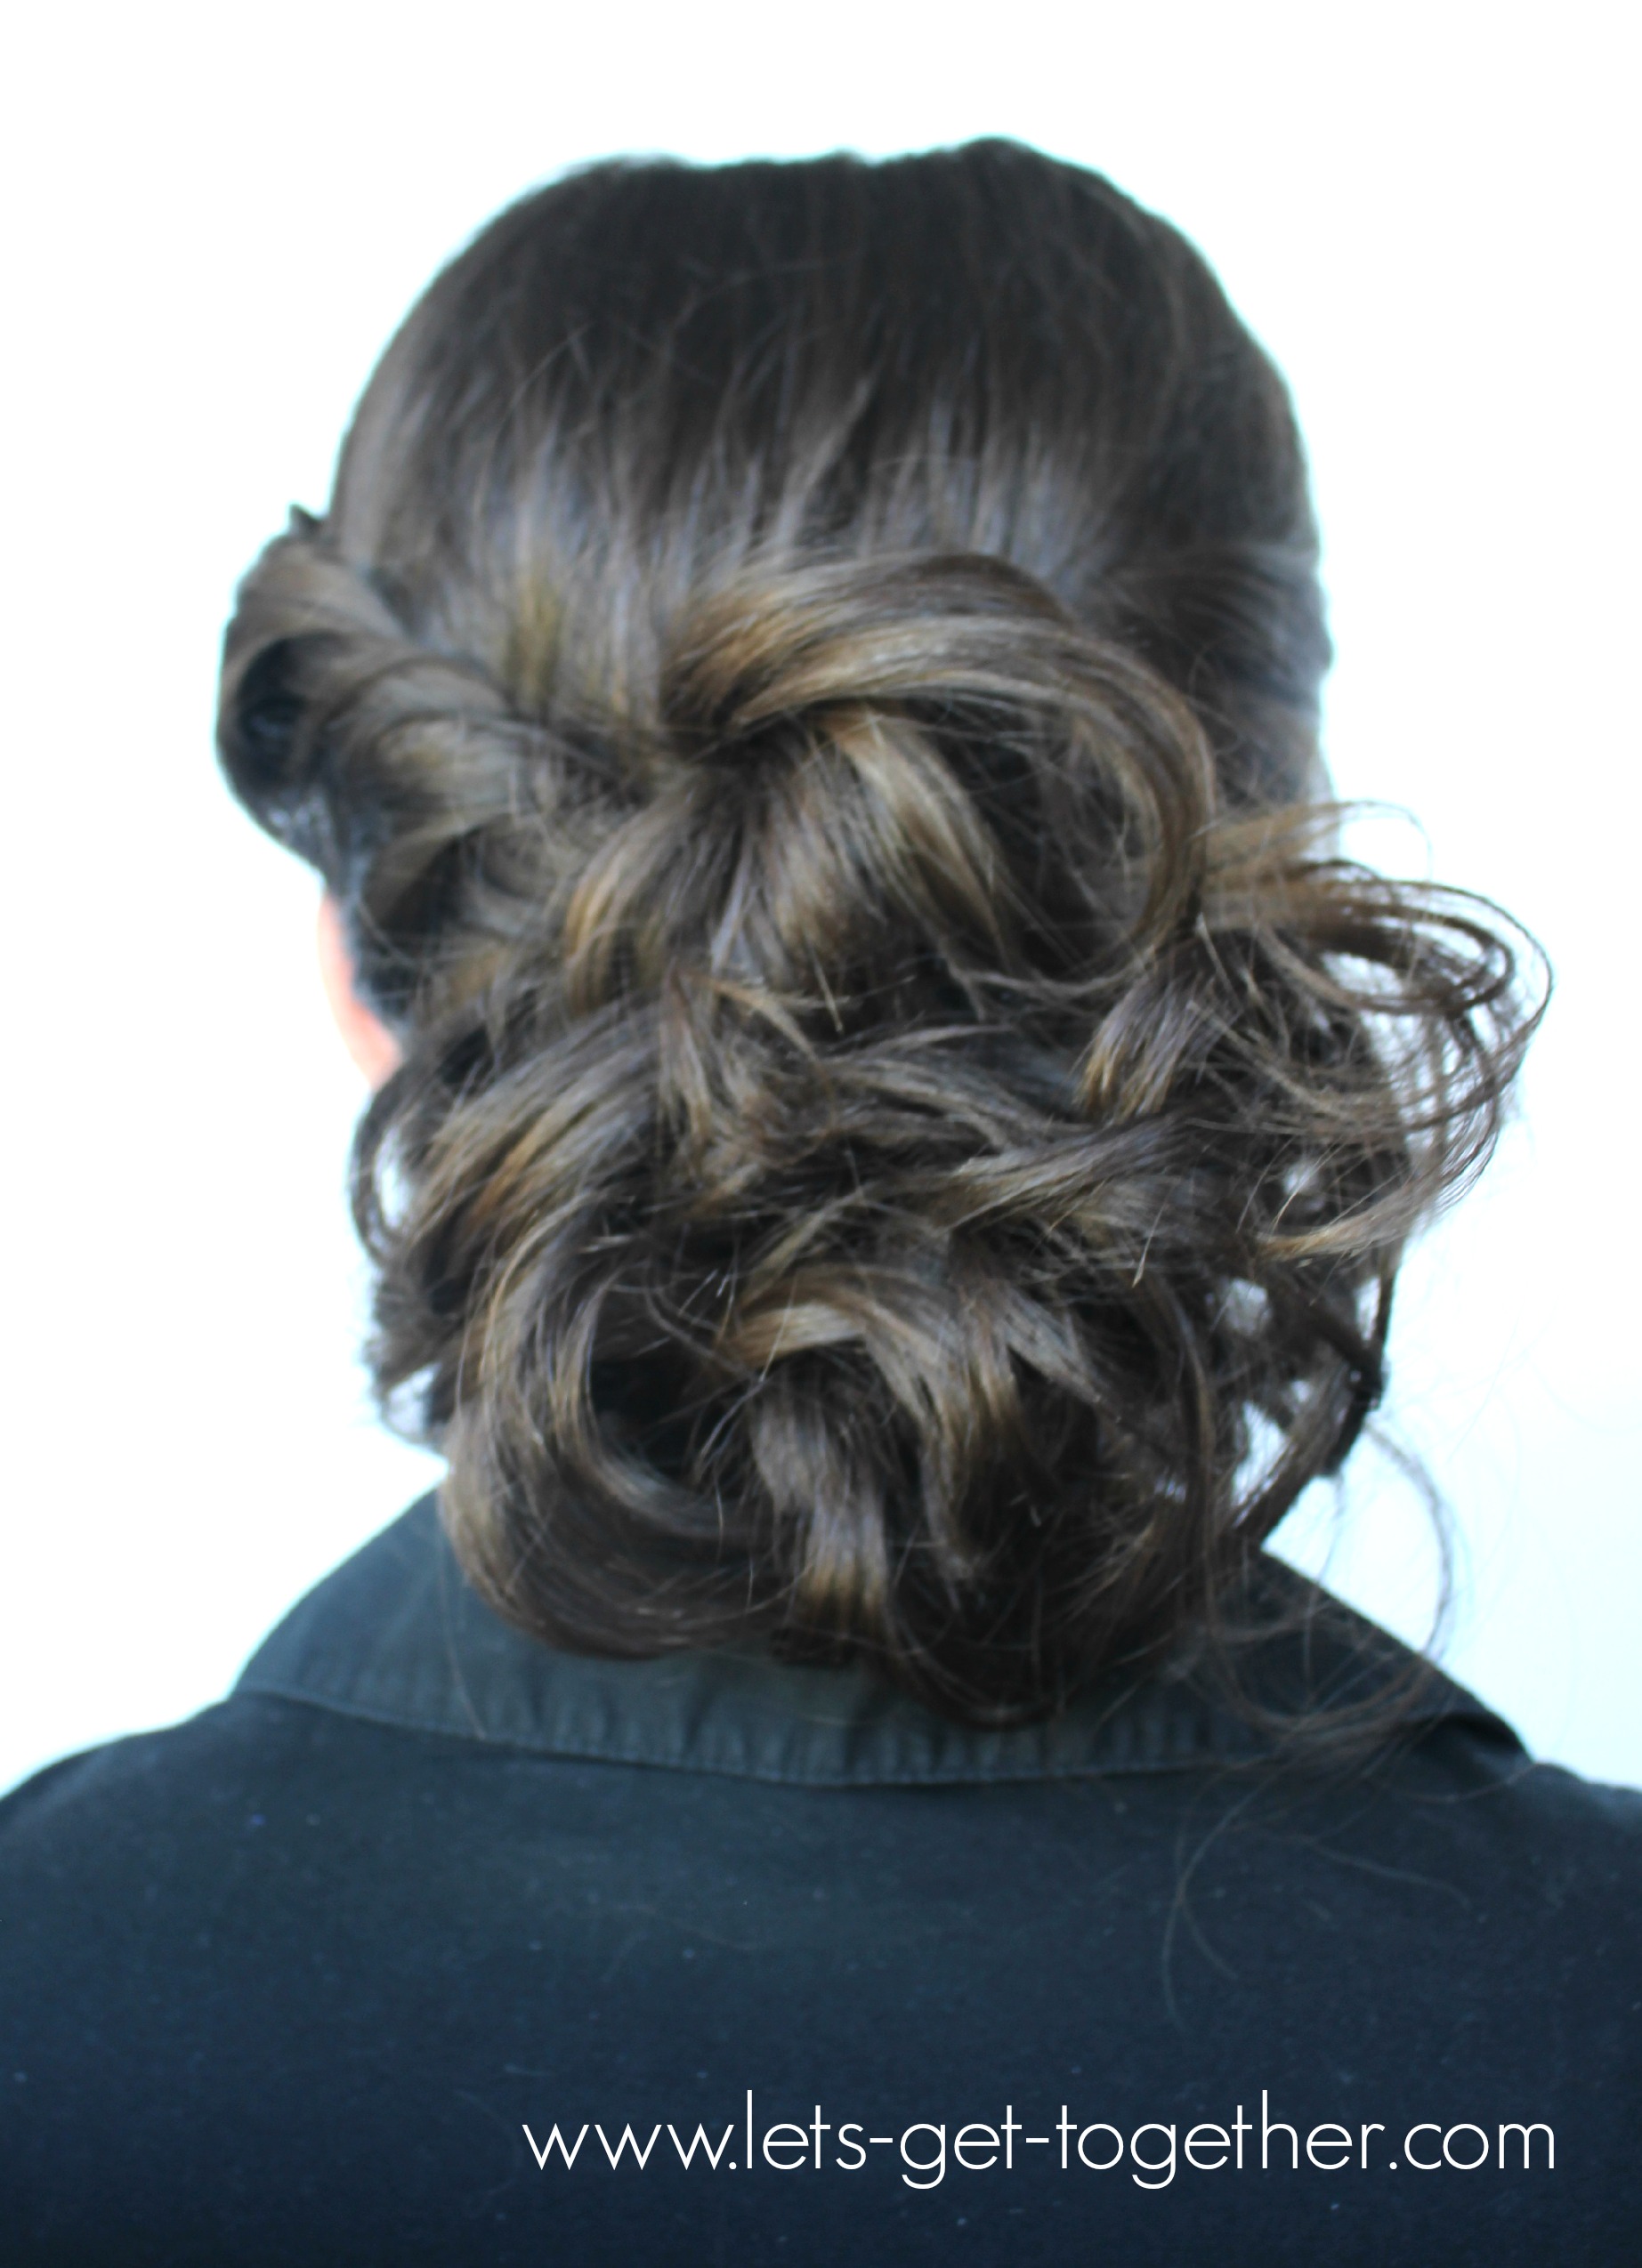
4. Gather your curls and pin the mass to your head with bobby pins. To make the curls have a rough, messy texture, do some light backcombing on the curls. From there, use one hand to push the curls up against the head and use the other hand to pin the curls in place.
5. Sweep the right side that was left out into the bun and pin the remaining hair in with the other curls.
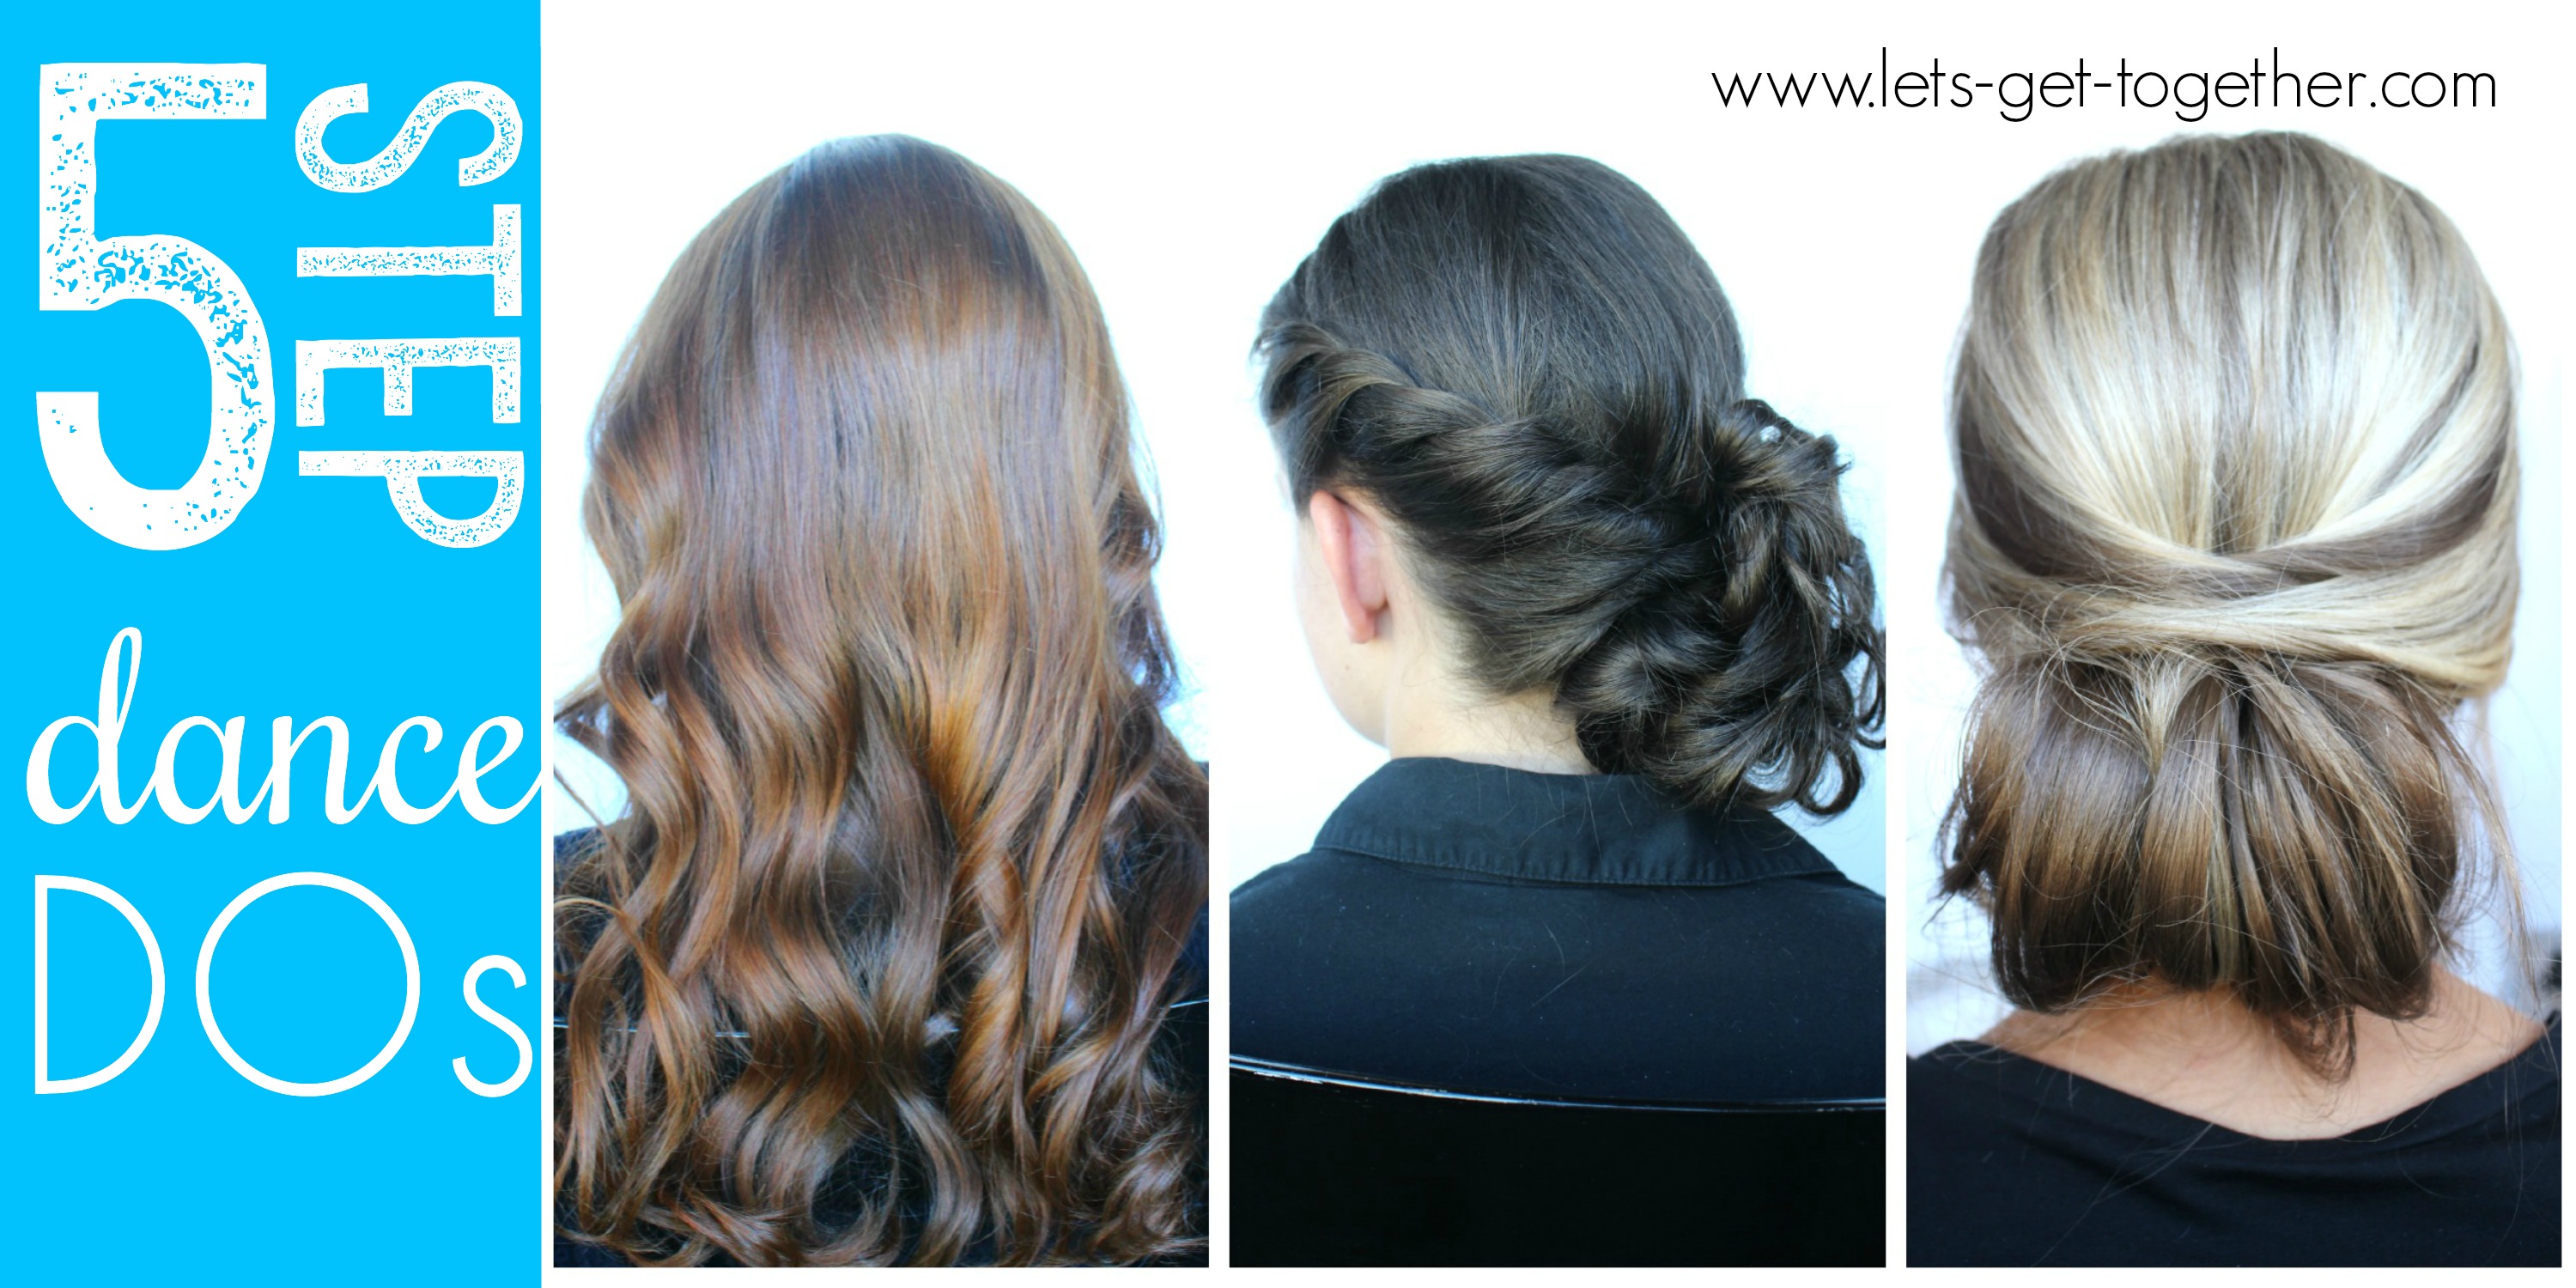
For our last 5-step dance do…
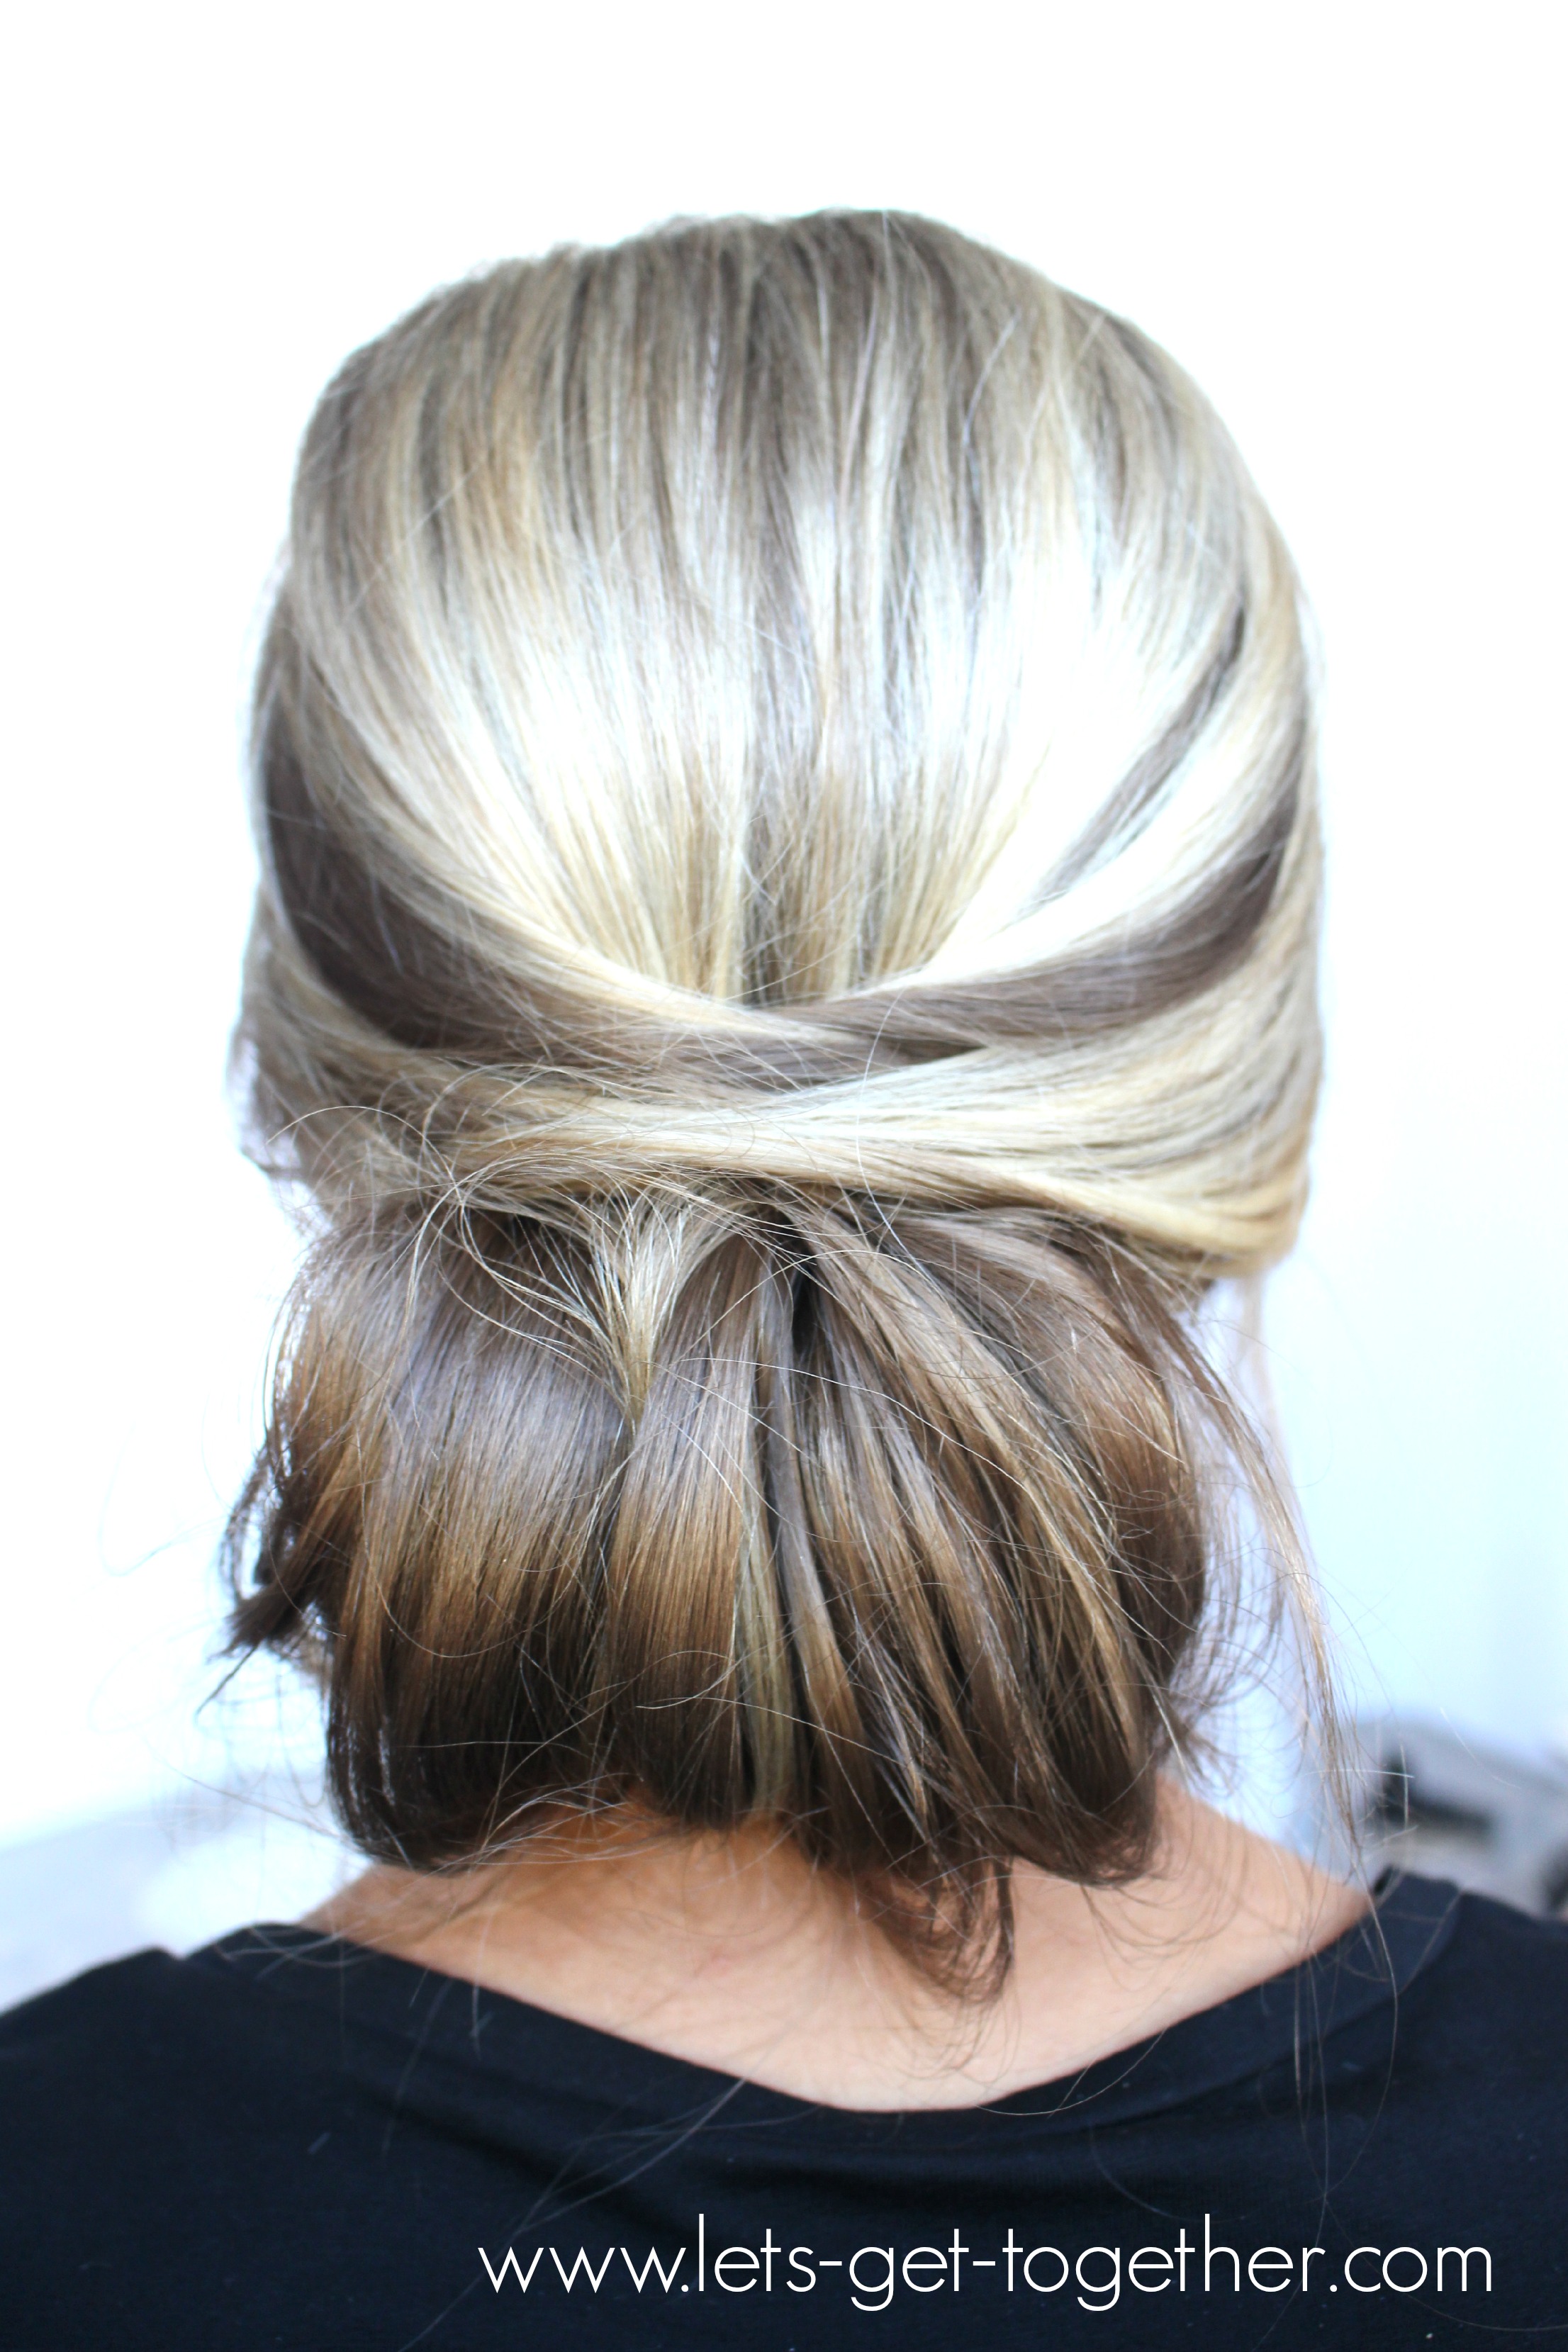
1. First, section out the hair in front of the ears like in the messy with a twist updo. Pin the hair in the back about halfway down the head or in a loose low ponytail.
2. With the hair left under the pin, you’ll flip and roll it up, then pin into place. Note: if you have thin fine hair, backcomb the top of the ponytail and then flip it up to make the bun fuller.
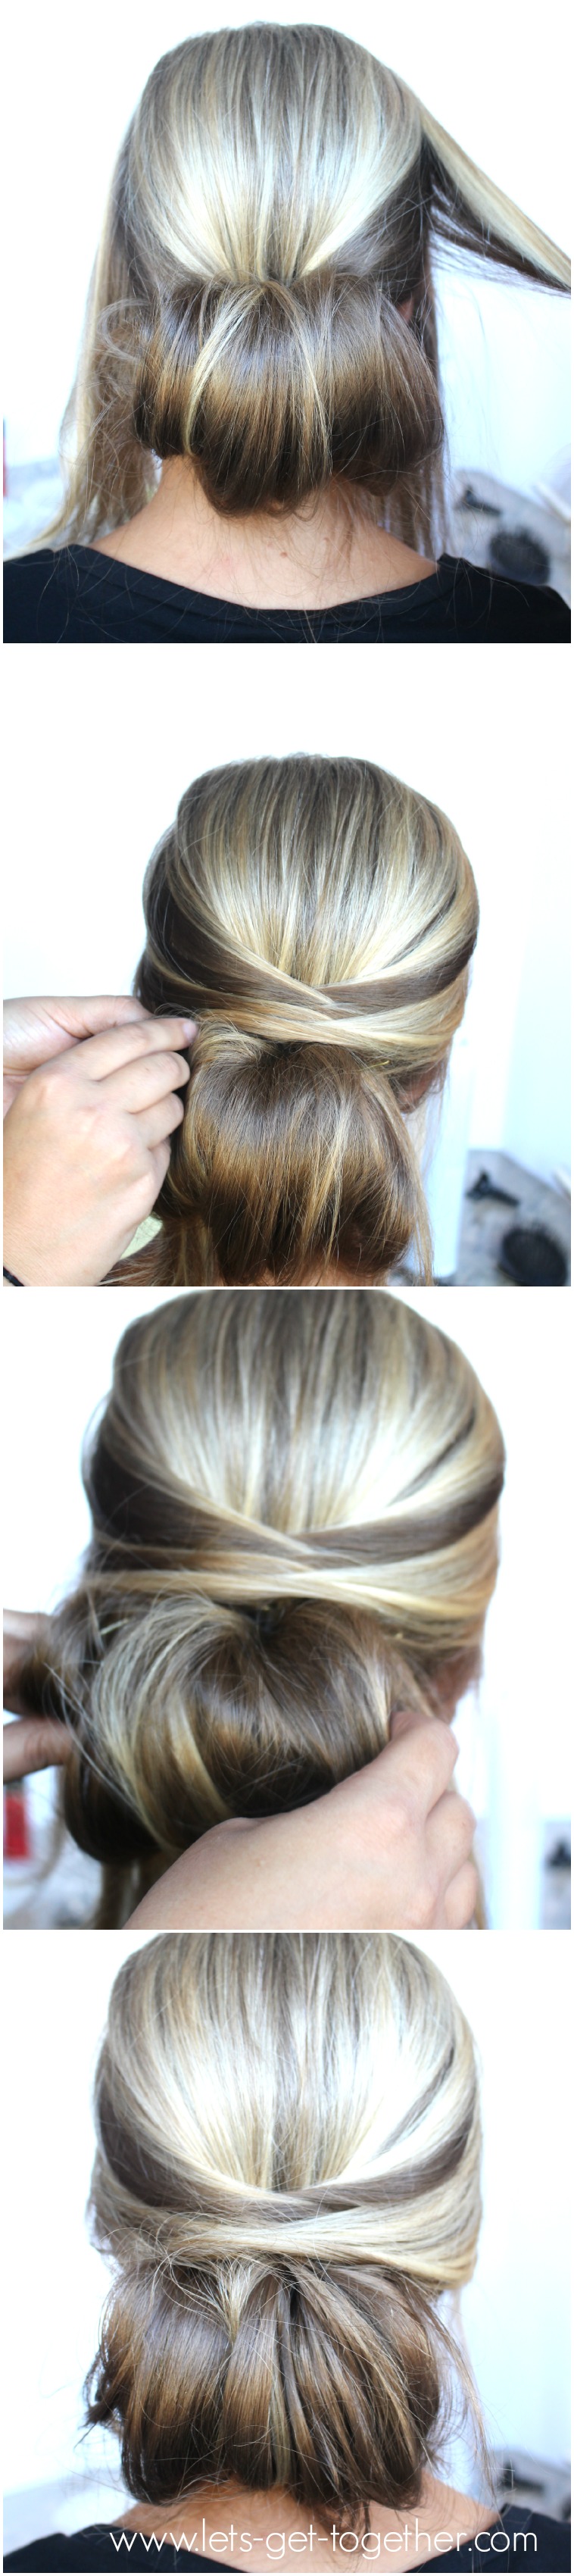
3. Start with a small piece closest to the bun, bringing it across the top of the bun and pinning it, then do the same with the other side and alternate back and forth until the last pieces from the front are brought across the bun. There will be hair hanging down on each side.
4. With the leftover hair hanging down, tuck them under the bun, and secure them with bobby pins the hide them.
5. Pin anything that needs a little extra help and finish with a hairspray.
There you have it. Three lovely 5-step dance dos that won’t make you look like Mufasa, thanks to the always lovely and super-talented Carley Dudoich.
Carley is a Southern belle and licensed cosmetologist, originally from Georgia, who now lives in Lehi. And if you have any make-up or hair needs, be sure to contact her. You won’t be disappointed. AND, she’s a lot of fun to chat with. That’s an important thing with a stylist, ya know?
Carley Dudoich
(678)516-8989
cdudoich@marykay.com
marykay.com/cdudoich
Natalie


I like that last one the best– so pretty!
Wow. I love this, especially the last one. Pinned!
I love the tips on curling and setting! I also LOOOOVE that last hairstyle! So beautiful!!
Some gorgeous dos!
Beautiful updo’s I wish had these steps when I was in High School. Pinning for when my hair grows out.